


Today we are wrapping up the reveal of the Banda Bungalow by sharing how we created two bathrooms in space made for one. And I think you’ll love this last reveal as much as I do.
In case you missed our previous posts, we went over the Exterior Transformation and how we turned this cute little house into a Pretty In Pink showcase. We then covered the ‘entertaining’ spaces of the house which walked you through the Living Room, Dining Room, and Kitchen transformations. If you didn’t get a chance to read those already, be sure the get caught up.
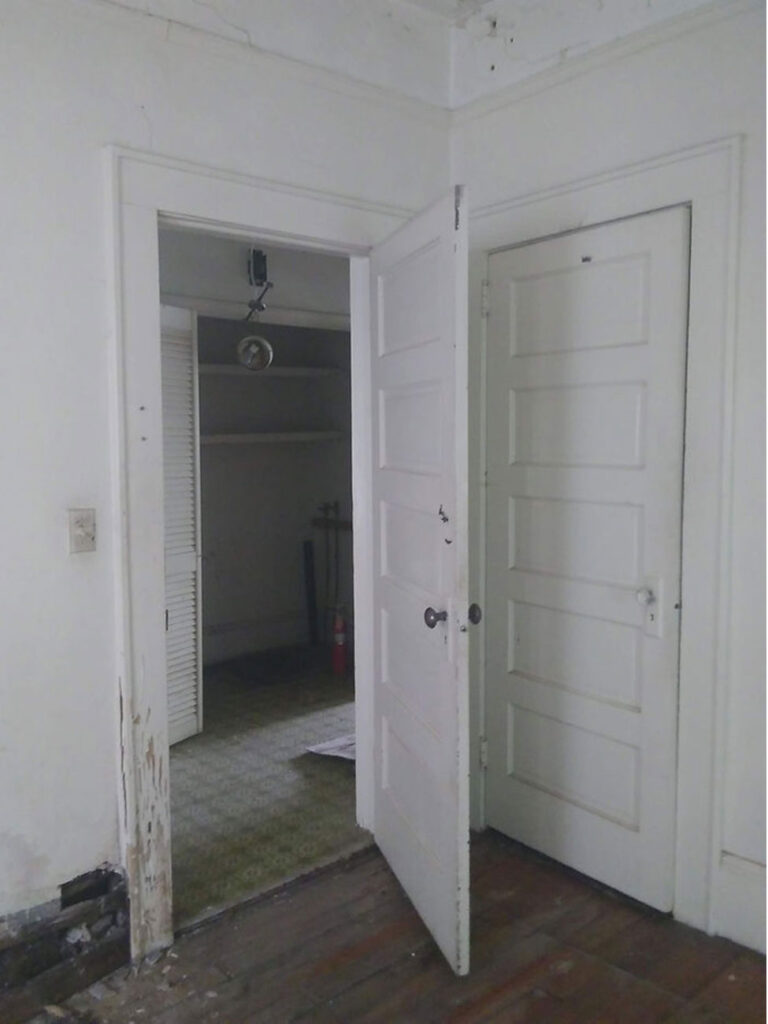
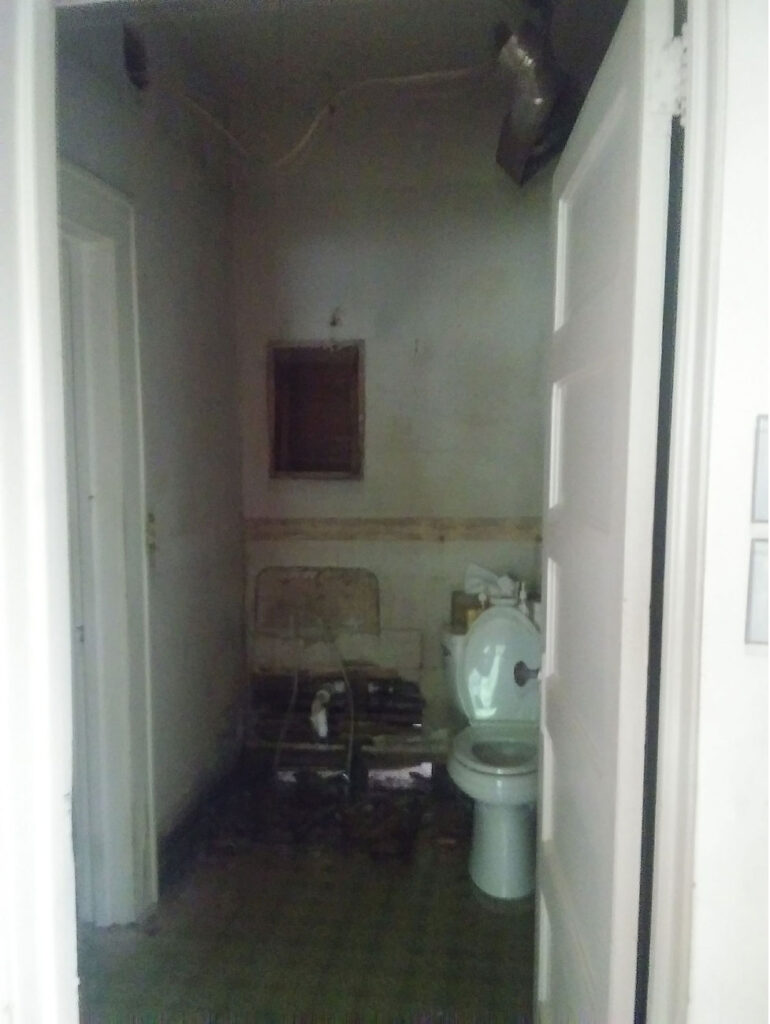
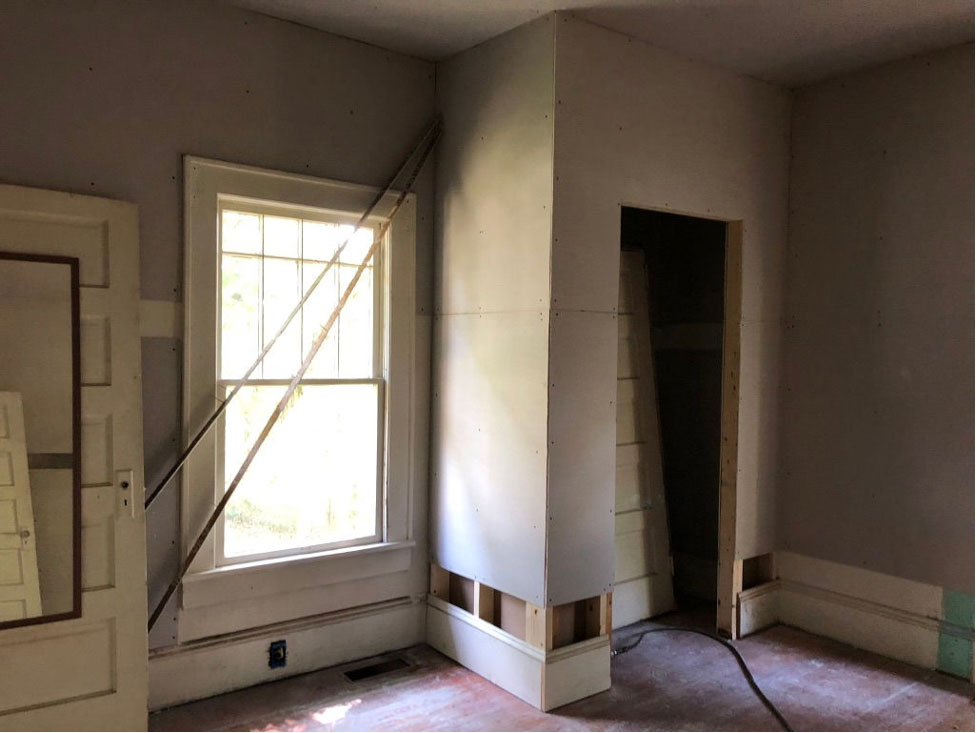
The Before
Wasted Space
We are down to the bathrooms and bedrooms of this renovation and I just love what we were able to come up with. Nothing makes me happier than being able to utilize every single square inch of a house into a functional space which is exactly what we did here.
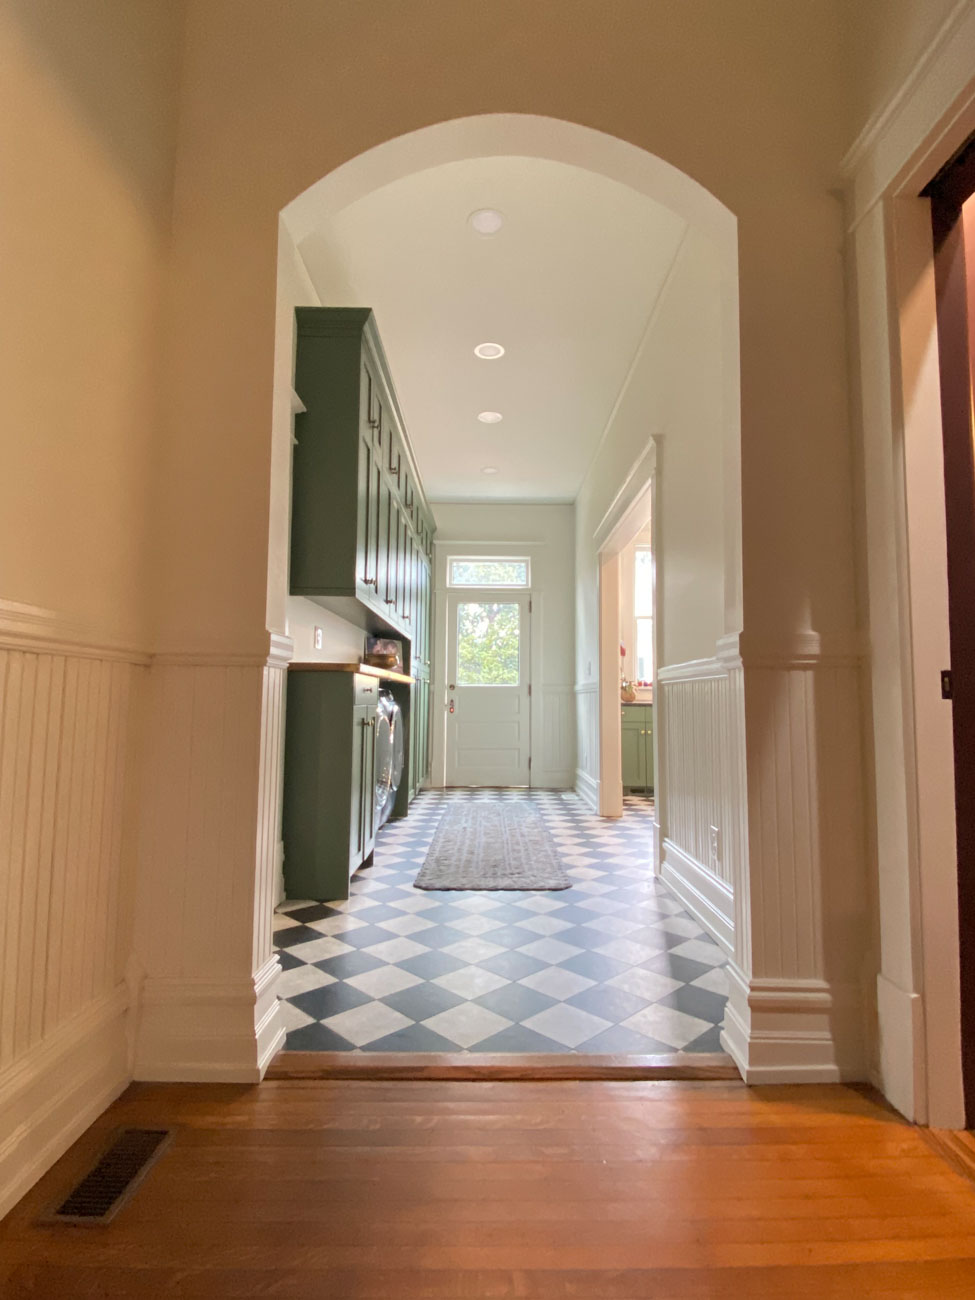
As I mentioned previously, this house was a 2 bedroom, 1 bathroom. It also had a huge hallway which was completely wasted space. The hallway had a washer/dryer closet to the right and served as the entrance to both the back bedroom and the only bathroom in the house. The tiny bathroom also was set up as a Jack-and-Jill which meant that two of the walls were taken up by doors.
While the original plan was to create one great bathroom with both a walk-in shower and a soaker tub (a must according to my client), it felt like we were beating our heads against a wall trying to make it happen.
The Solution – Two Bathrooms
After countless layouts that didn’t work, we switched our thought process. We decided to create two bathrooms in the same space rather than one. If you’ll remember from last week’s post, the washer and dryer were relocated to the porch off of the kitchen. This meant they were no longer a factor in this space.
This new solution created two things: a private master suite and greater resale value with two full baths. It was absolutely the greatest use of this square footage and while it was an added cost on the front end, we both felt like it would be worth it in the end.
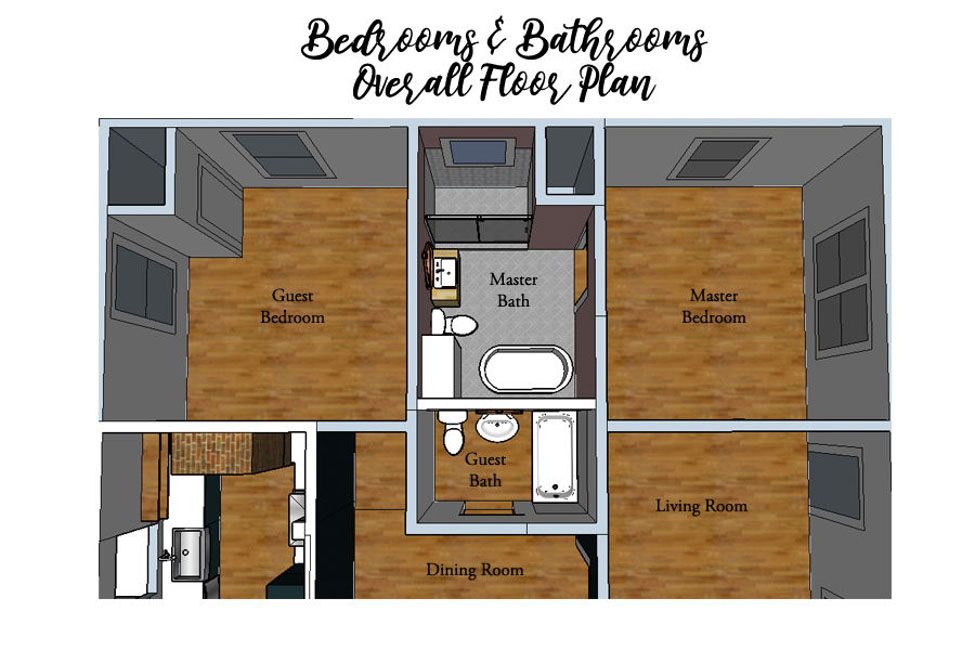
Guest Bedroom and Bathroom
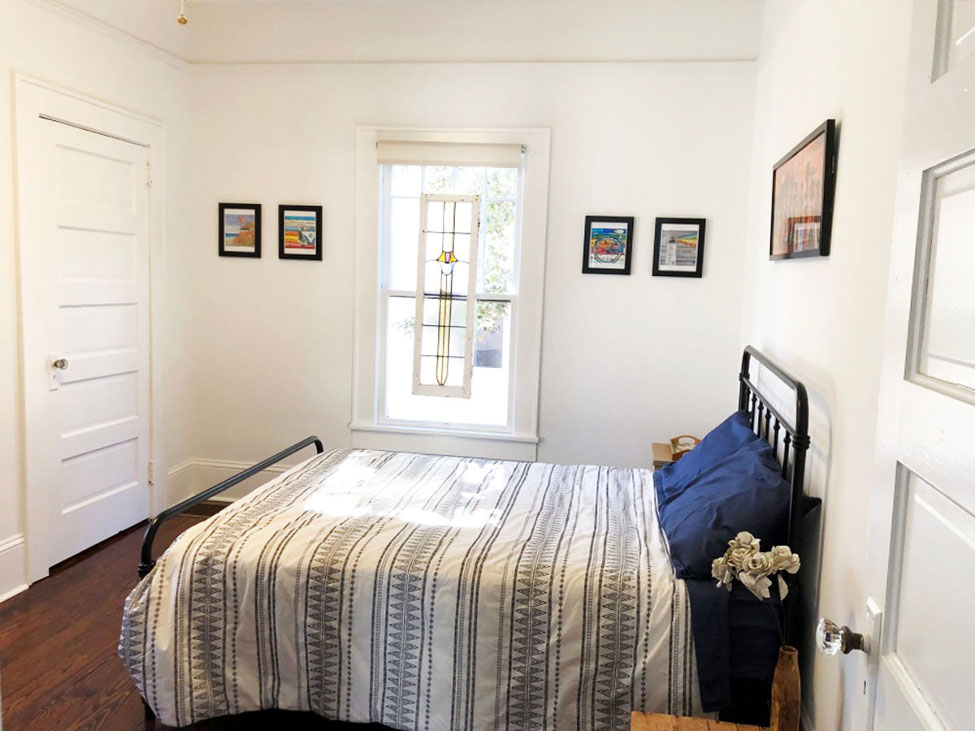
Guest Bedroom
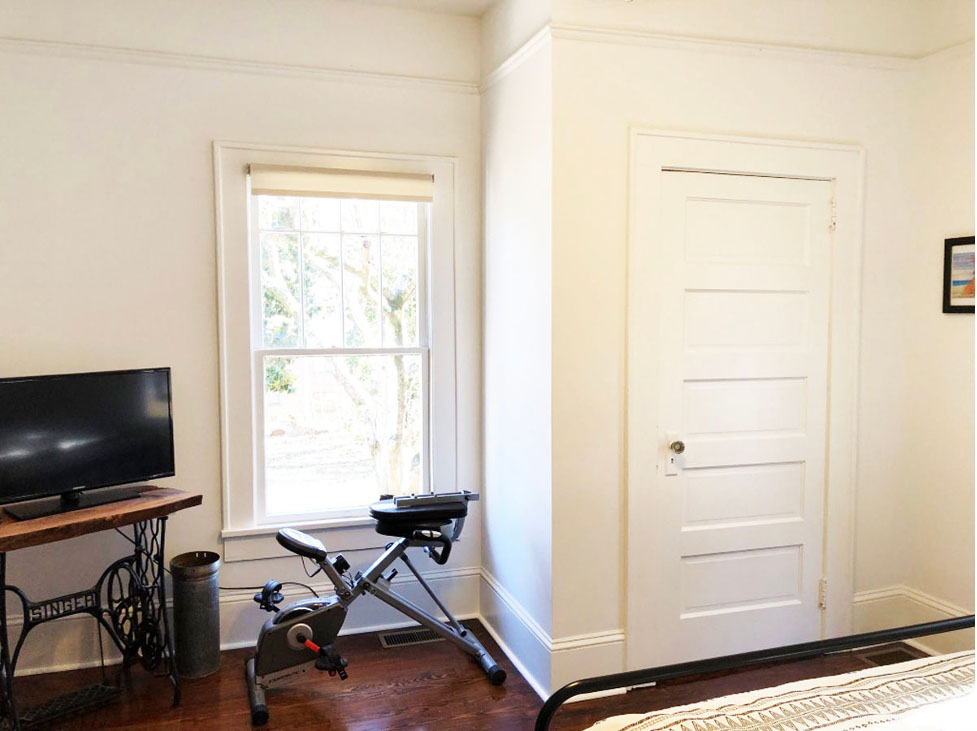
Since the back bedroom had two closets, we removed the one closest to the dining room. This move made the new entrance to the bedroom. We also ended up tearing out the second closet and repositioned it to make room for a queen sized bed. One tip to making a built-out closet seem original is to make sure the detailed trim is carried out. Here we reused the door and casing, but also continued the picture molding and baseboards for a cohesive look.
Guest Bathroom
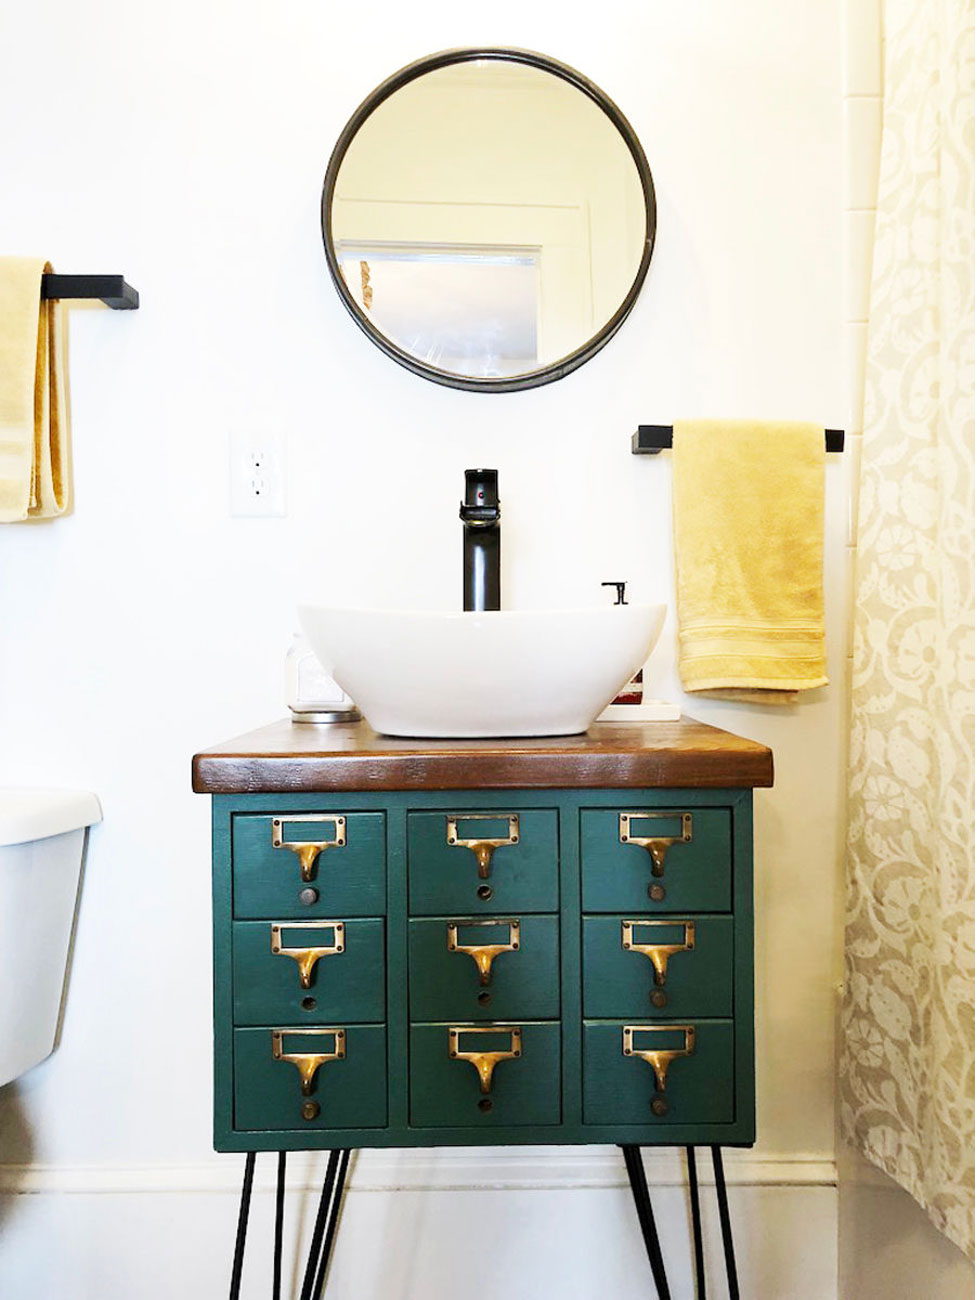
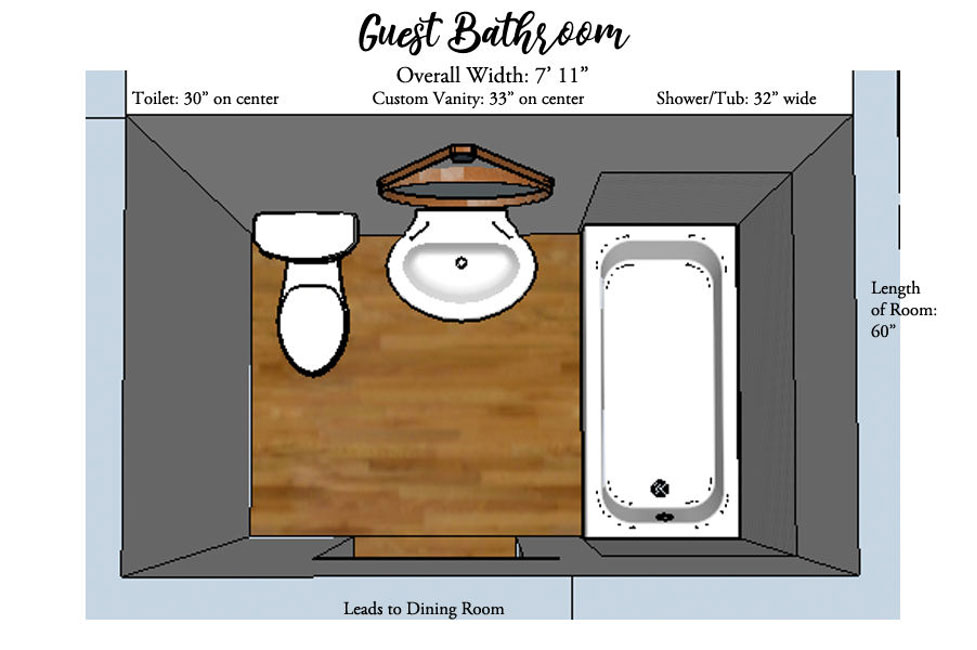
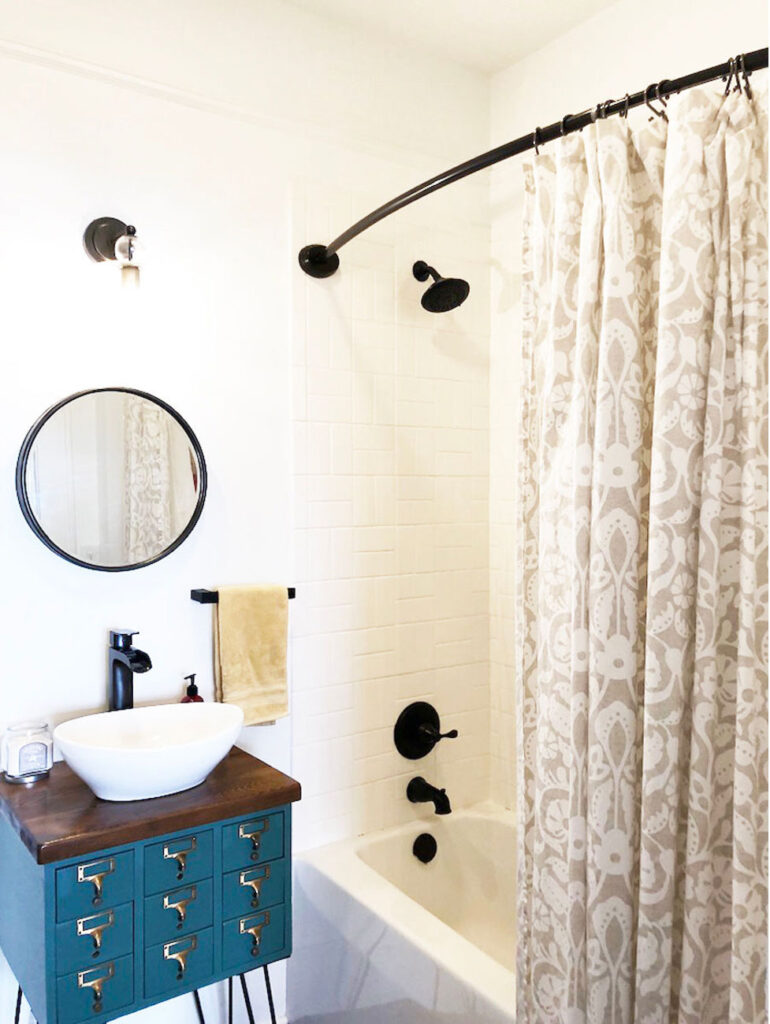
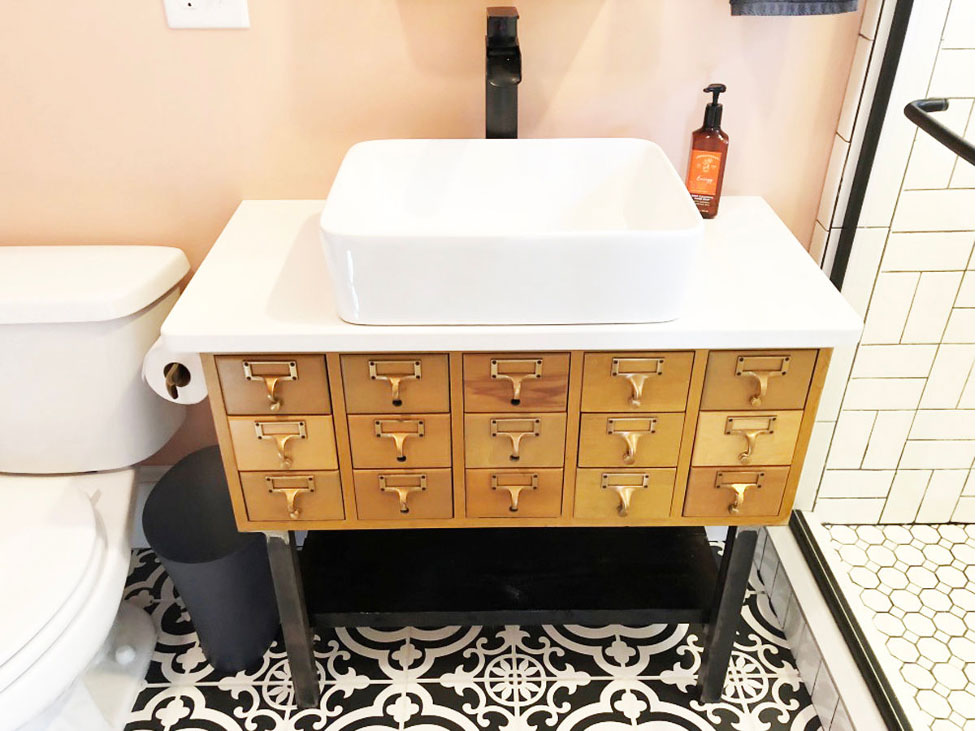
With the wall where the bedroom door was previously located, we had just the right amount of space to create a guest bathroom. We planned this room literally down to the inch so much so that I made the guys bring in a toilet to make certain that the door could swing inward and miss the toilet. It’s the small things like this that make a difference in a small space. Since I’m a visual person, I sometimes have to ask the guys to go the extra mile to make sure we’ve got it right. The depth of the room is the absolute minimum – 60 inches – which allows for a standard size tub to fit. So the lay-out is simple: L to R toilet, custom vanity, tub/shower.
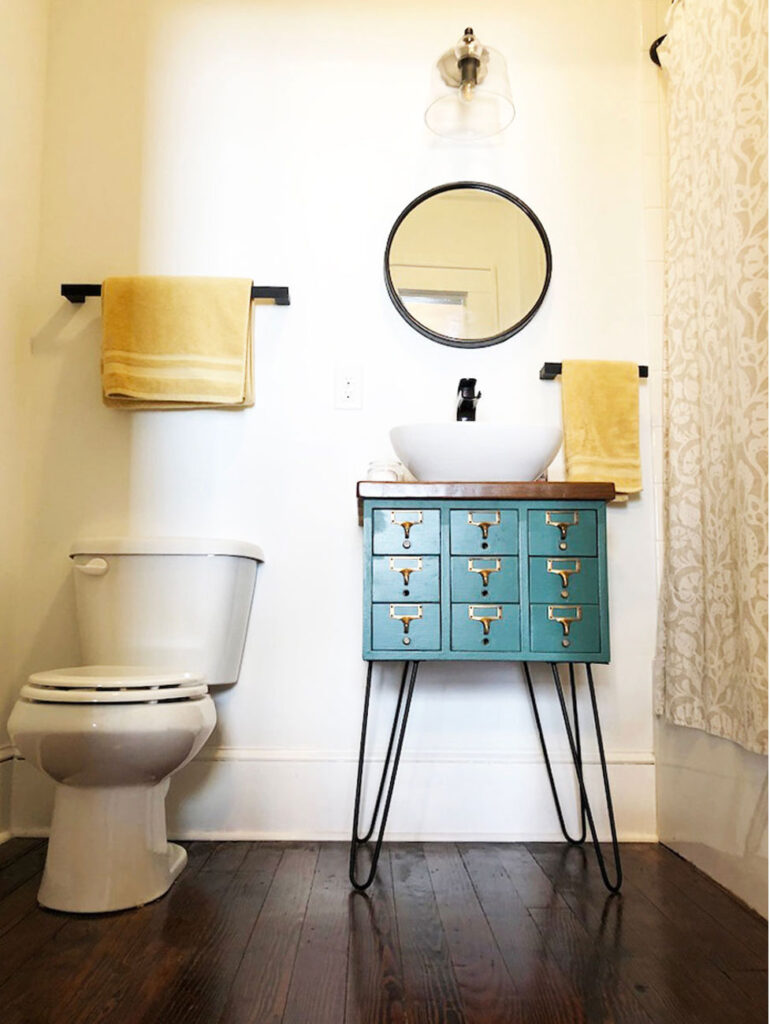
While the shower surround is a crosshatch pattern of classic subway tiles, the custom vanity really steals the show. My client is a librarian and she wasn’t kidding when she said she had a lot of vintage card catalogs. They’re all throughout her house. Right from the beginning she said she wanted to use some of the card catalogs to build her bathroom vanities so that’s exactly what we did. We were able to add legs to the base of the unit, a cedar countertop, and a vessel sink and modern faucet. I love the way it turned out and the personality it brings to this bathroom.
Master Suite
Master Bathroom
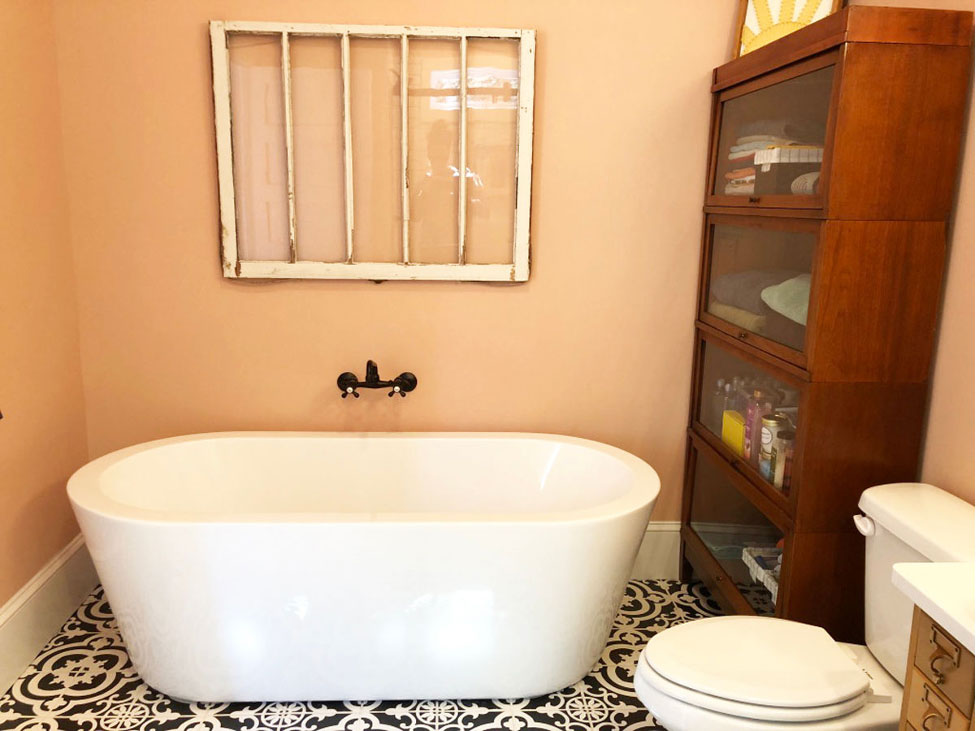
Since we only used what space was absolutely necessary for the guest bathroom, all of the remaining hallway space was available for the master bathroom. Remember, we were looking to add both a walk-in shower and a soaker tub along with a standard toilet and another custom vanity. And guess what, everything fit perfectly! We removed the wall that previously housed the hallway entrance which opened up the space but left the other walls and doorway in tact.
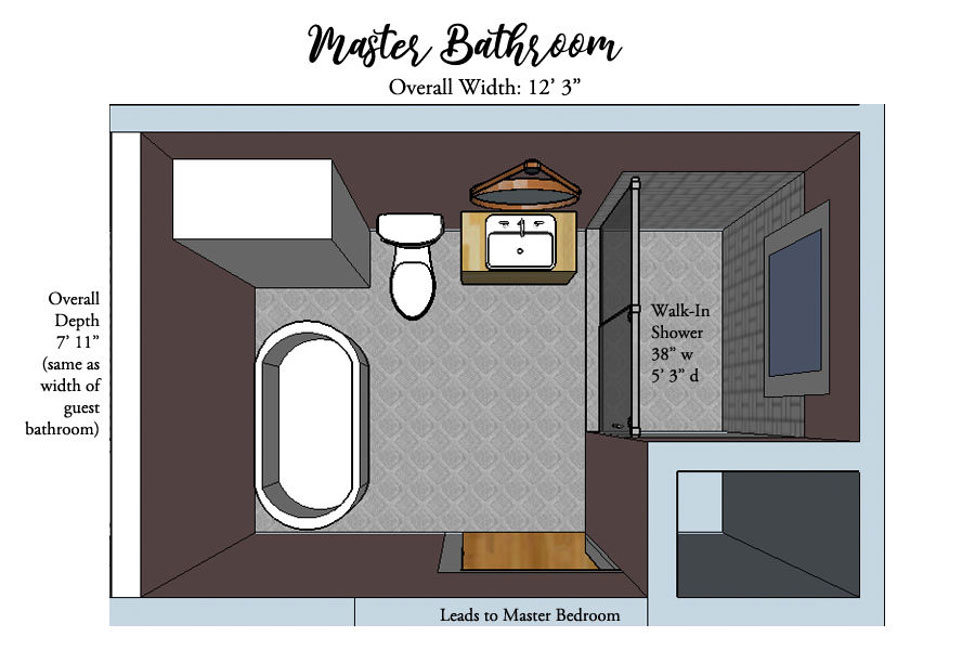
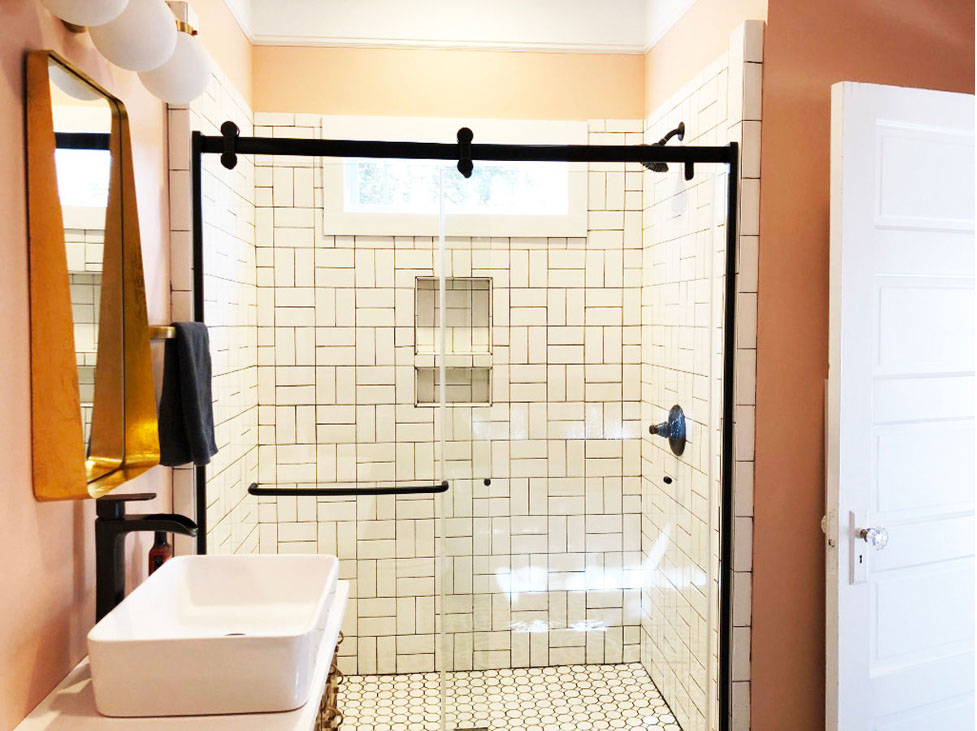
We replaced the large window with a smaller one so that we could create the walk-in shower. The shower design is also the crosshatch pattern but this time with black grout. And the sliding double glass door keeps the feel of the room more open.
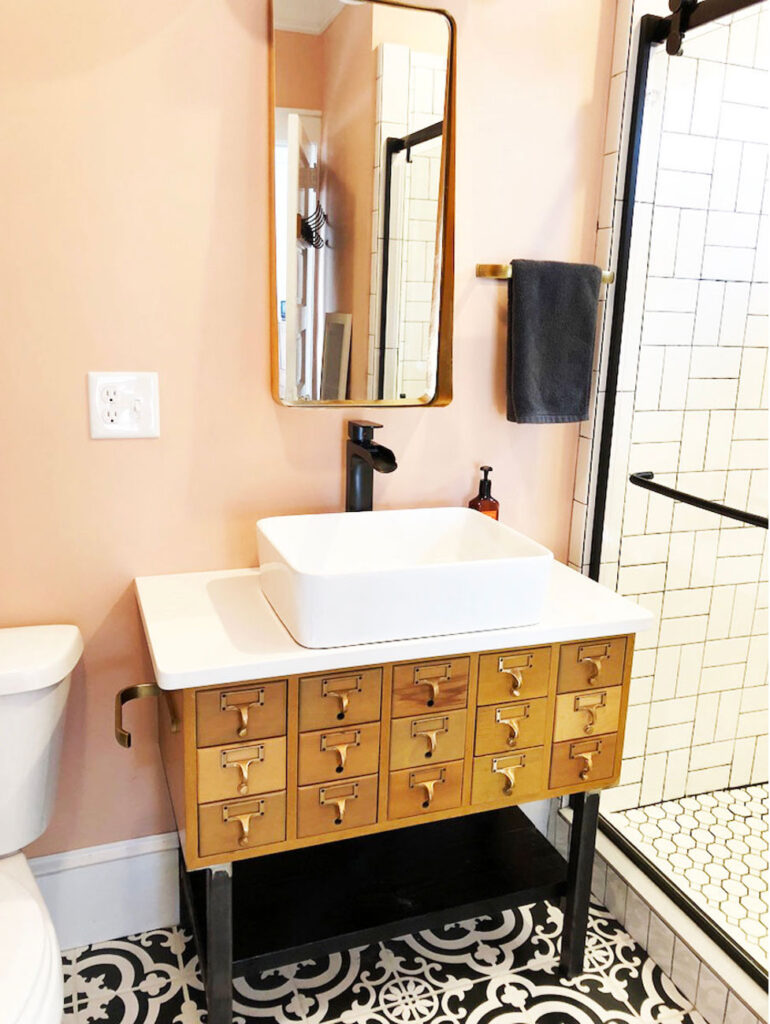
To the left of the shower is the second custom vanity. We once again used one of the card catalogs my client has held onto over the years for this vanity. This time we left it in it’s natural wood state and added sleek legs that accommodate a shelf on the bottom for additional storage. On top we had a piece of quartz cut to size with a vessel sink and modern faucet to finish off the look.
Tip: In order to minimize costs, we used the same quartz as we did in the kitchen. This allowed us to save some money since they would be installed on the same day.
On the left wall, we were able to add a large soaker tub with the wall mount faucet handles. Tip: Be sure to think through these type of details before plumbing rough-in begins and certainly before the sheetrock goes up. The tub was an absolute must-have for my client from the beginning. She was actually willing to give up the walk-in shower if she had to pick one over the other. Luckily, she didn’t have to make that call. To complete the room, we painted it a pretty shade of peachy pink and added a few brass accessories.
Paint: Behr Cockleshell MQ1-31
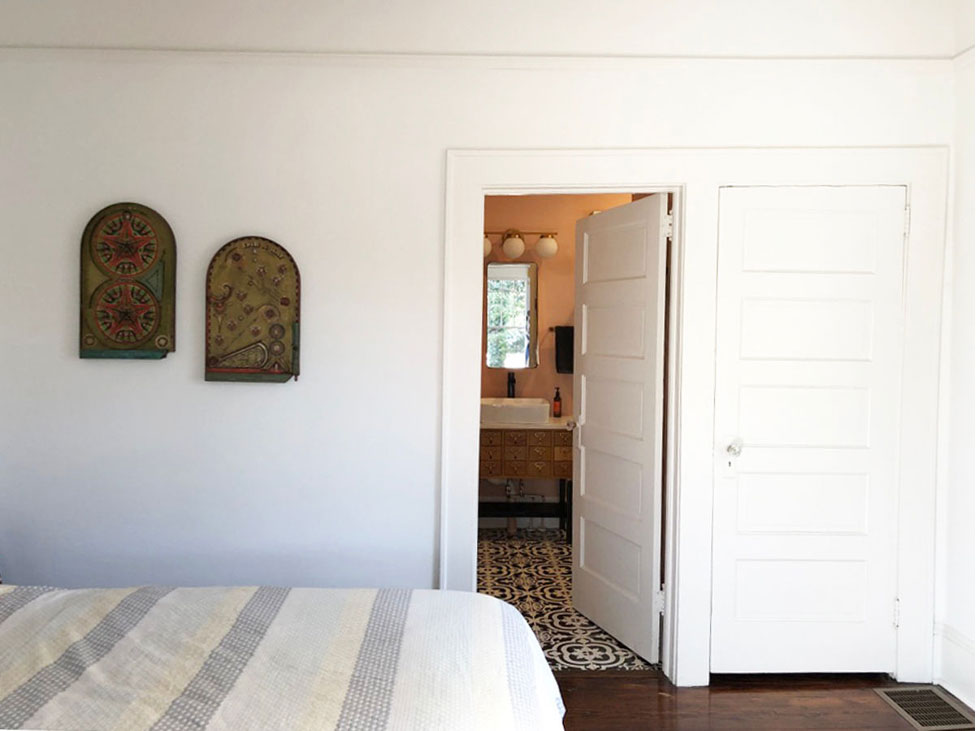
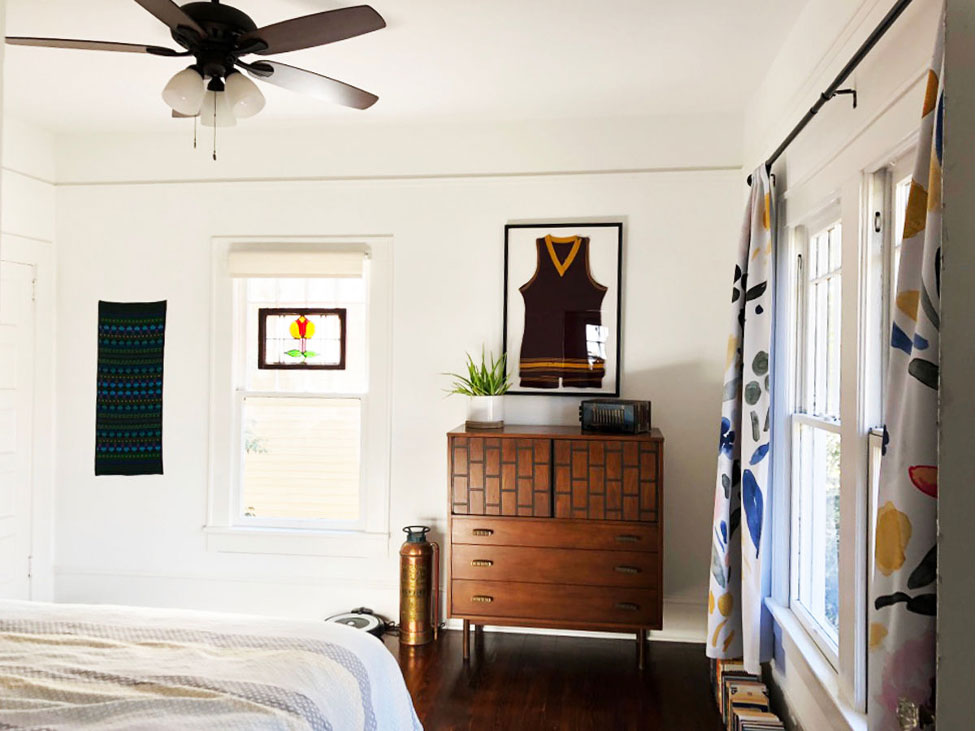
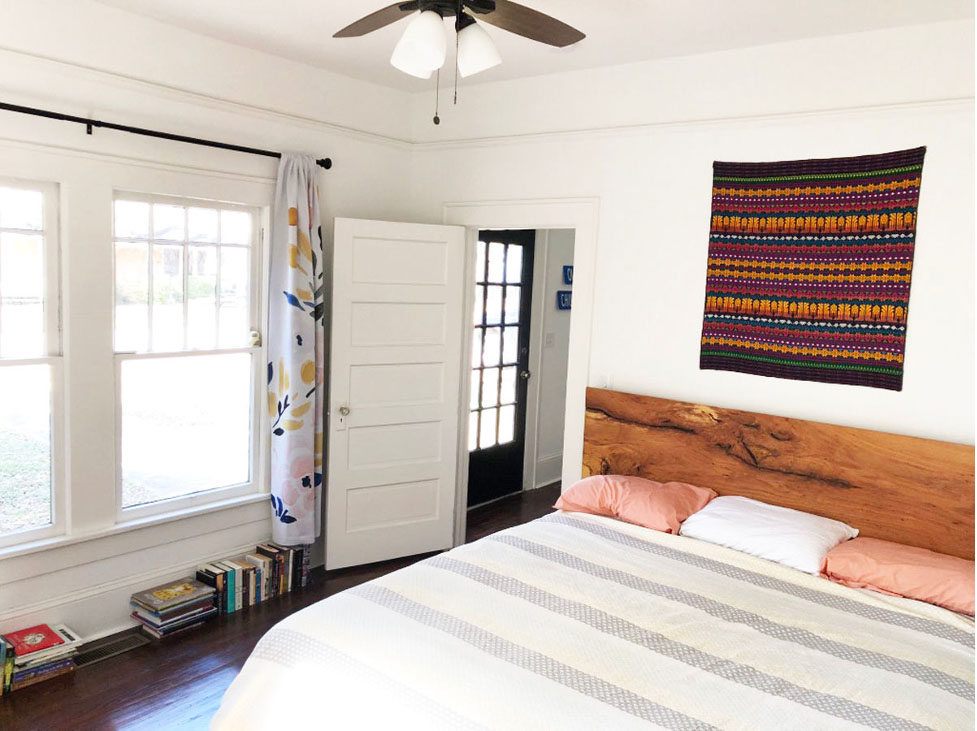
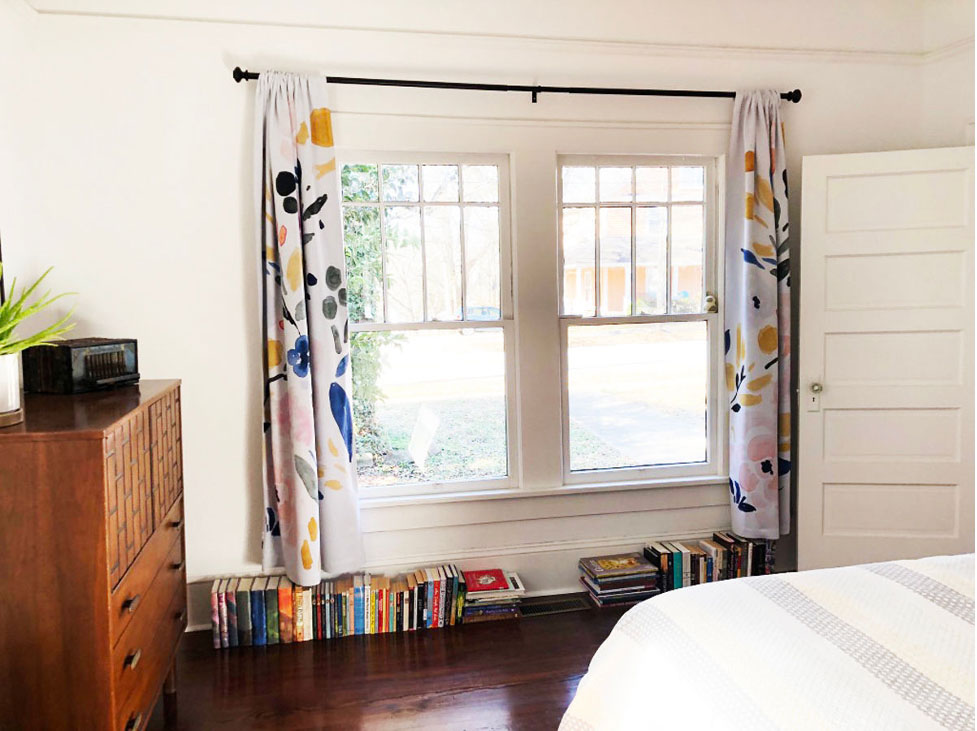
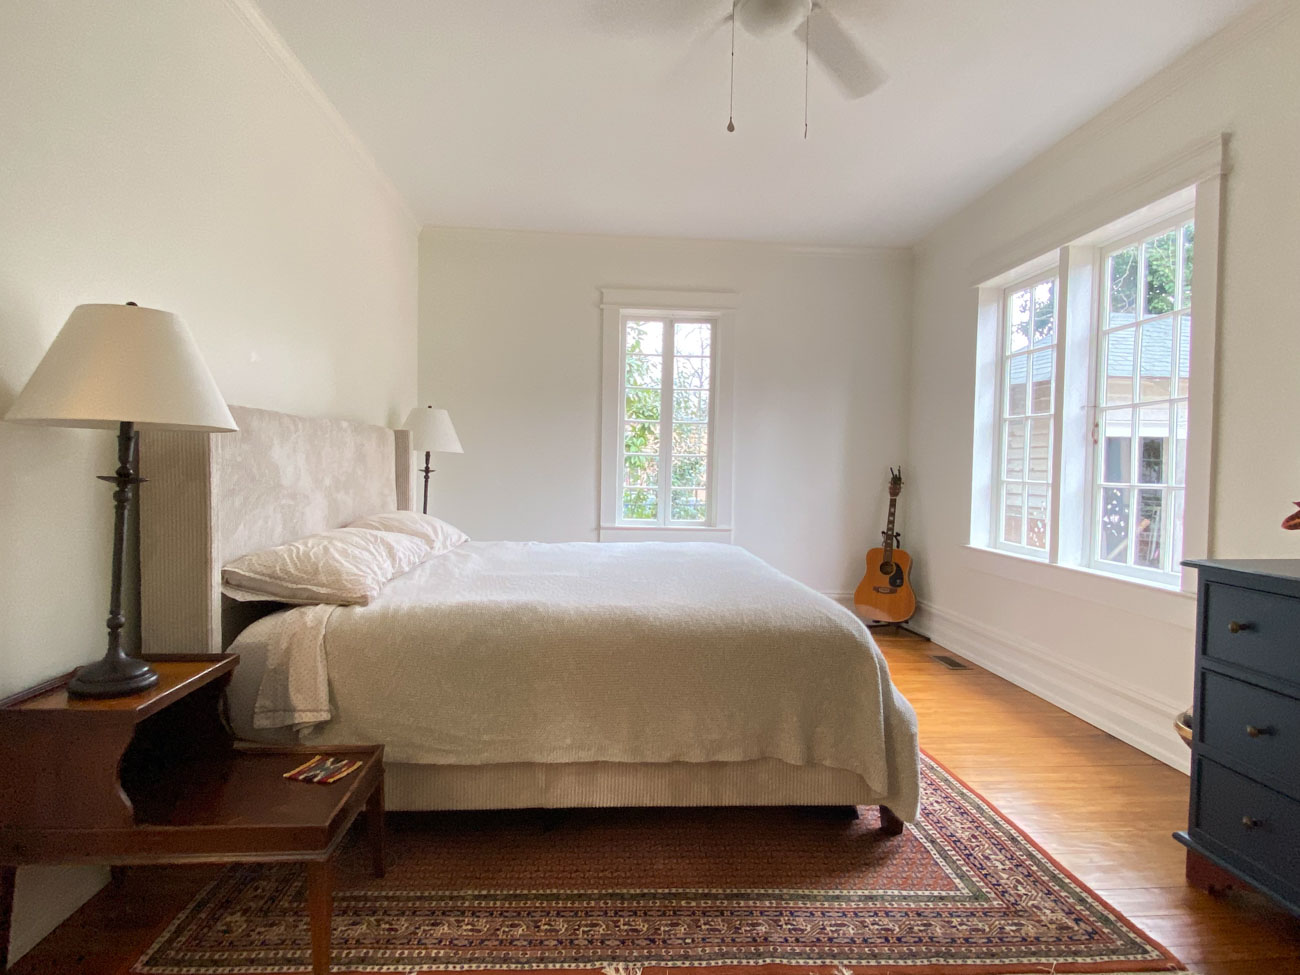
Master Bedroom
And because my client has super cool taste, here are a few pictures of her master bedroom.
We hope you loved following along on the Banda Bungalow renovation as much as we did. As always, if we can ever be of service to you, be sure to reach out.
@heather_homes
Hang out with me in Stories for all the
Behind-the-Scenes


+ Show / Hide Comments
Share to: