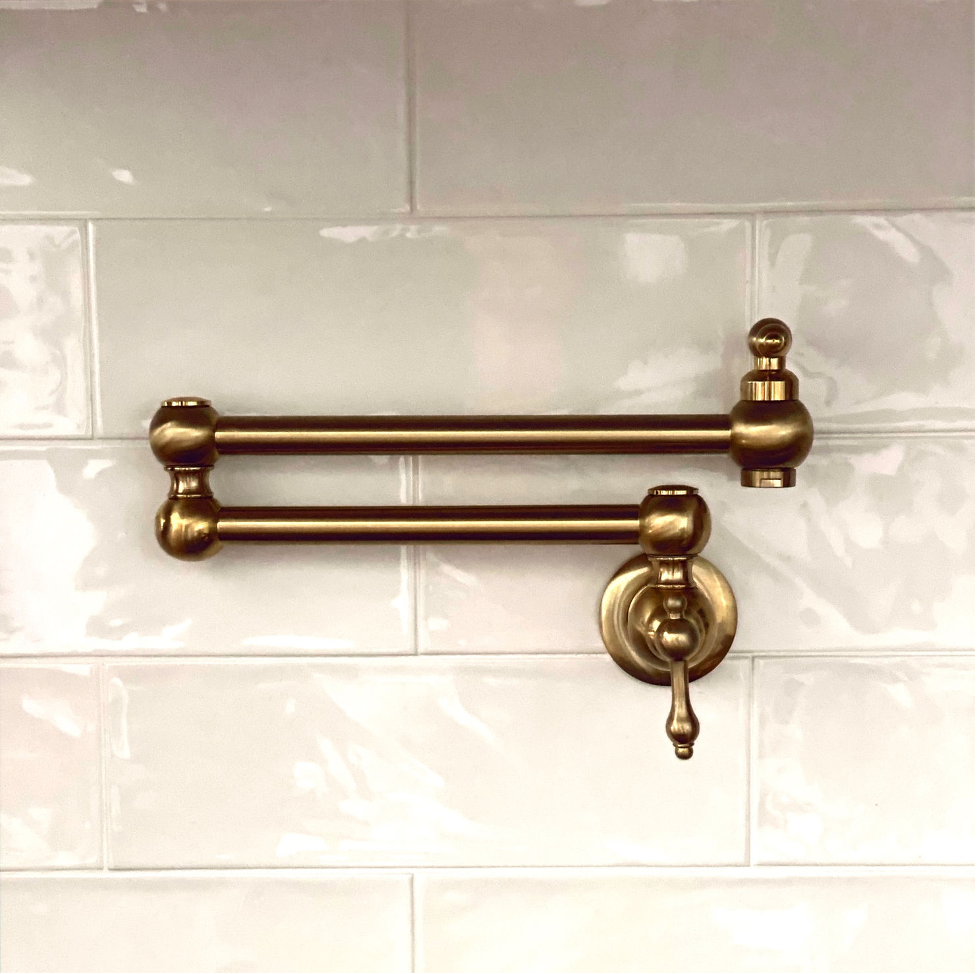
My Fancy Pot Filler


Last year I switched out my glass top electric range for a gas one. Honestly, it was just a want, not necessarily a need. However, I can say that the change has made me want to cook far more than I did before, which was almost never. I’m not sure exactly why – perhaps I just needed a new hobby or the switch made me feel like I should at least give cooking a try. Regardless of the why, the change has made me feel like I actually could figure this ‘cook like an adult thing’ out. So then I decided I needed a pot filler.
Like I said, with one change, another one is usually close behind and so I decided I needed a pot filler. You know, a water spigot that sits above your range so you can fill up your pots easily even though my sink is exactly two steps away from the range. I quickly started searching for an affordable pot filler (under $100) in gold and here’s what I found.
The pot filler I found was only $70, comes in a brushed gold finish, and honestly is prettier than the online picture shows. I love it! It’s no longer available but here’s a similar one I’ve used that comes in several different finishes. Since I didn’t have a water line behind the range I scheduled a time for my plumber to handle the installation and took the following steps to be ready when he arrived. By taking care of these items ahead of time I was able to keep the overall costs down a little.
Here are the steps I took:
As you can see, I have a ceramic tile backsplash which I installed a few years ago.
Remove the tile backsplash
Since the plumber needs to mount the water line to the wood framing in the wall to secure it, I needed to open up the wall to see what was behind it. This meant I had to tear out some of the tiles. Before you begin removing tiles, make certain you have enough extras to reinstall once completed as many of the tiles will break. I was lucky in that I had plenty left over in storage.
Using a utility knife, score along the edges of the tiles you need to remove to loosen and ultimately remove the grout. This is especially important so that you don’t break more tiles than you need to.
Now that the grout is removed take a flat crowbar and a hammer and pop out the tiles you need removed. I will say two things here: First, you’re going to break most of the tiles you’re removing. In fact, a couple of times I had to intentionally break tiles in the middle with the hammer in order to get them out. And second, it’s quite possible that you’ll go through the drywall with the force of the flat crowbar so also be ready to replace it if needed.
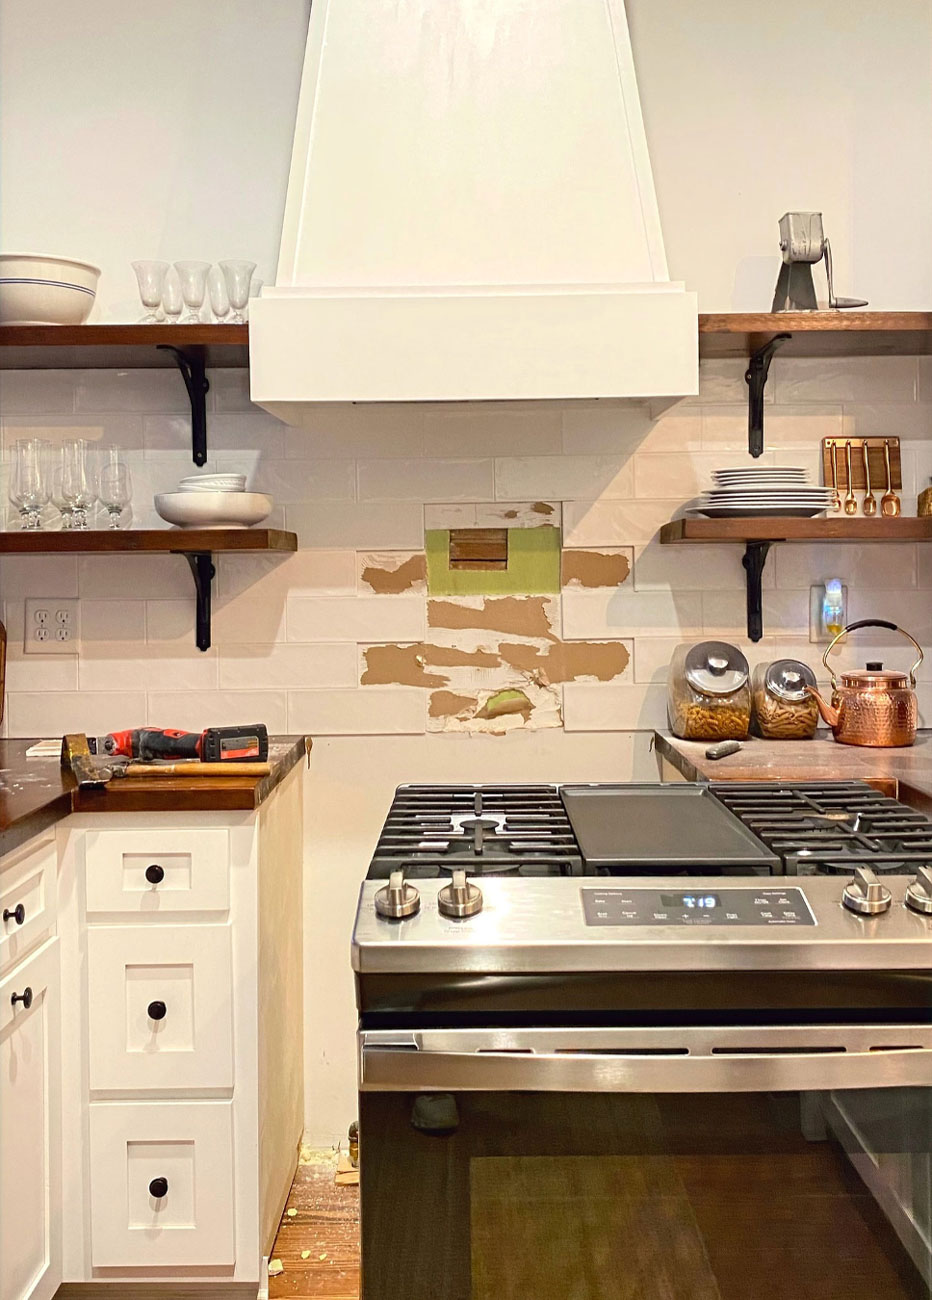
Open Up the Wall
With the tiles out of the way I then used an Oscillating Multi-Tool to cut out a small area of the drywall. This opened up the wall so I could see what we were working with. Luckily there was an open cavity in between two 2×4’s so we would only need a little extra bracing to mount the water line. I will say if you open up the wall and find a 2×4 directly in the middle, you will need to notch it out enough so that the water line can be mounted at the appropriate depth if that makes sense.
Call the Plumber
With the wall opened up and my spare tiles in hand, I was ready for the plumber to arrive. I did want to mention here that it might be possible for your plumber to handle all of these steps for you. I would just ask ahead of time and if he won’t, and you can’t, arrange to have a handy man/woman take care of this ahead of time. My goal is always to save money where I can and since I’m capable, I went ahead and took care of these steps so my plumber wouldn’t have to.
Once he arrived has was able to drill a hole from under the house and feed the water line through that hole, through the open wall cavity, and up to the area in the wall that I had cut out. We did get pretty lucky here since we didn’t have to open up the wall near the floors. He then added a little extra bracing and mounted the water line to the wall (the plumbing rough-in).

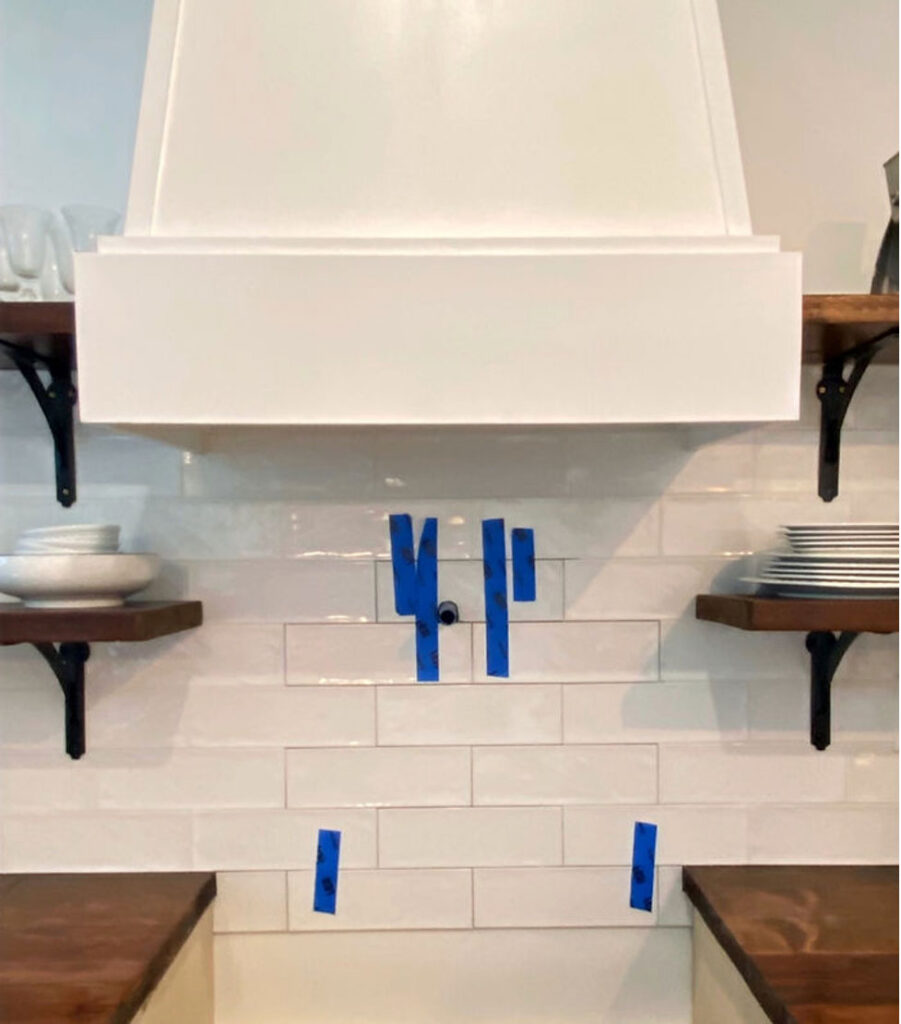
Reinstall the Tile Backsplash
From here, his job was done for the time being and the next couple of steps were up to me. Because I had carefully removed the drywall I was able to easily reinstall it and then got to work installing the replacement backsplash tiles. I gave the thin set several hours to dry and then grouted all of the tiles late that night since the plumber was coming back the next day to attach the pot filler.
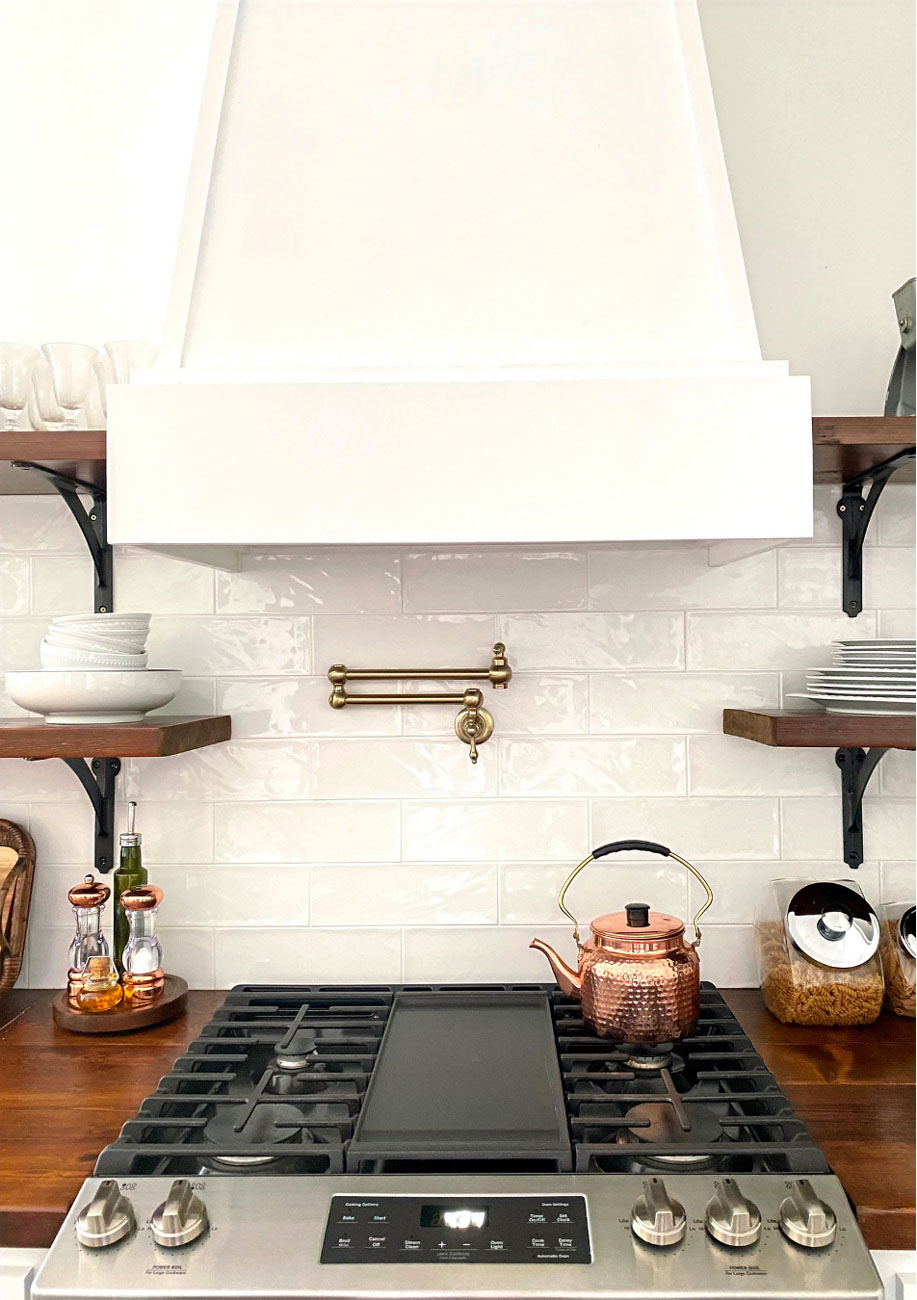
Install the Pot Filler
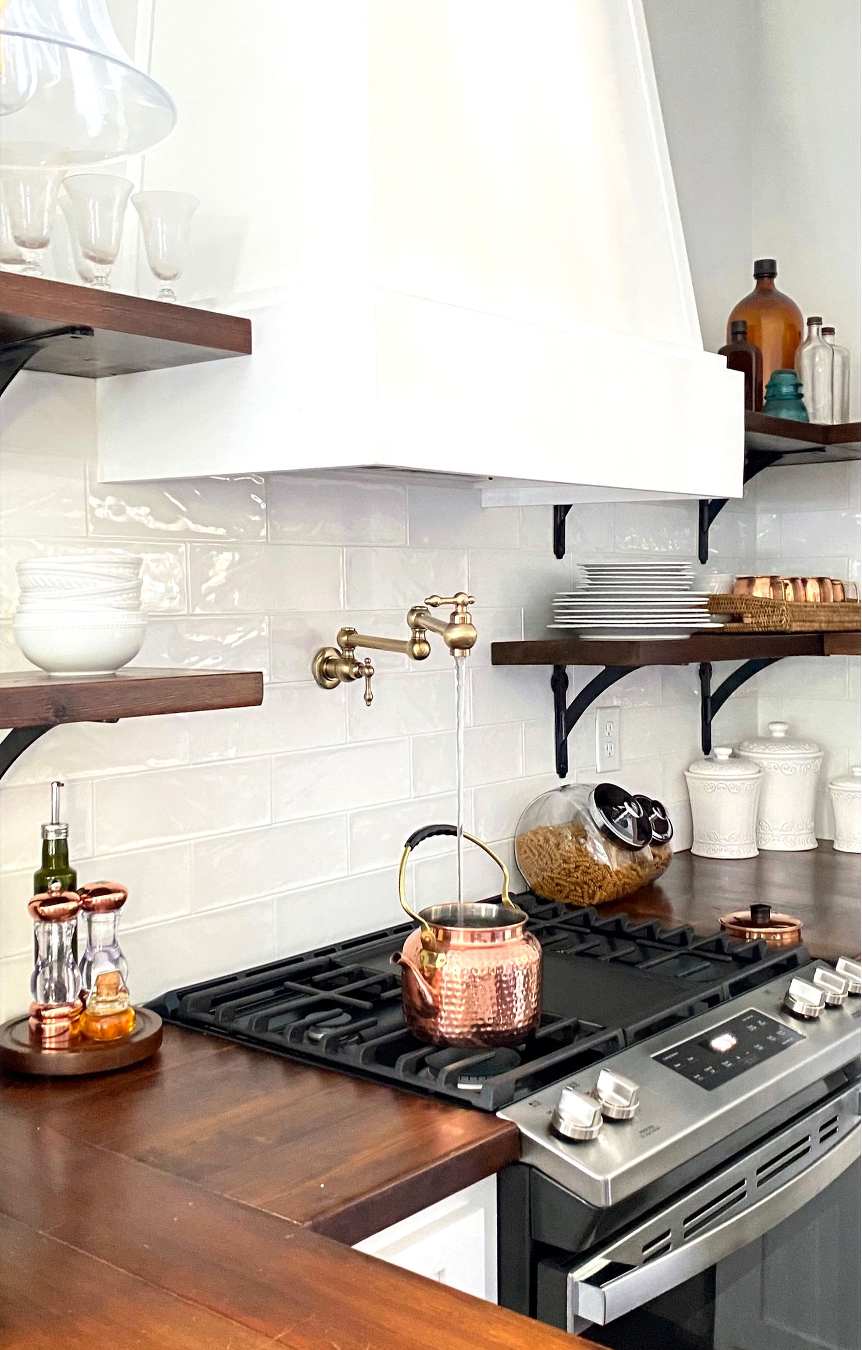
When my plumber arrived the next day he was able to attach the pot filler relatively easily and in no time the pot filler was working. Quick note: If you need to drill through ceramic tiles to attach plumbing fixtures or for any other reason, here are two drill bit sets I recommend. Just be sure to take your time so you don’t break the tiles.
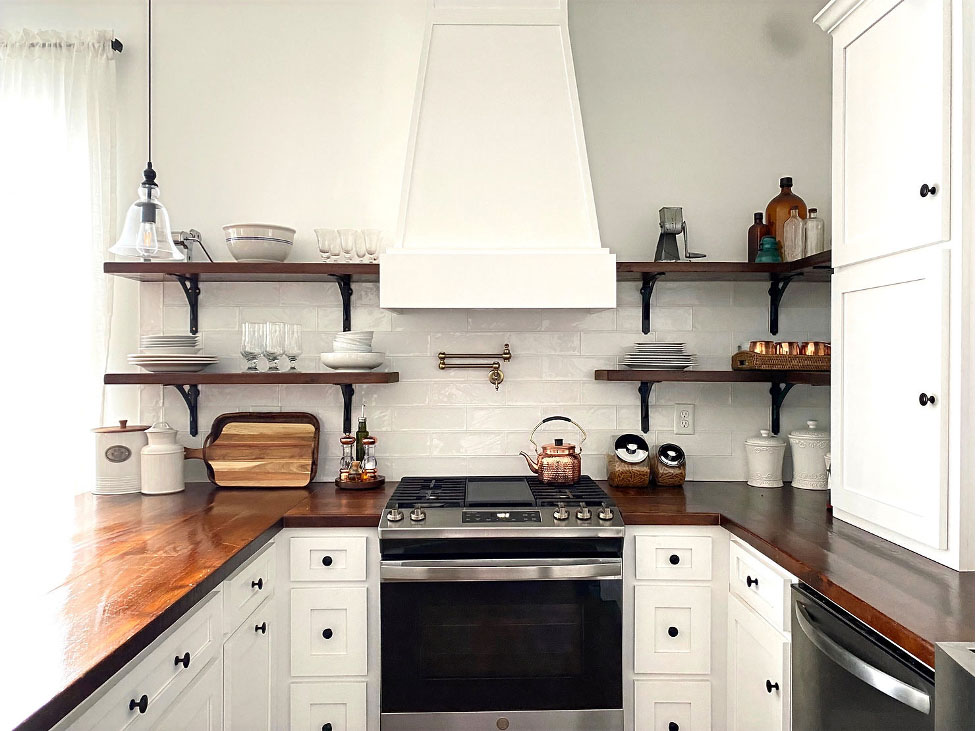
Now that my pretty pot filler is installed I must say I feel quite fancy. Oh and the greatest part is that it only cost around $300! I love how this small change made a big impact for my kitchen.

READ LATEST
the


+ Show / Hide Comments
Share to: